


想要拍摄aws es手动快照,按照官方指导操作一直未成功,一直报403,折腾了好久,最后发现是open distro 的权限设置问题,记录一下。
# 需要使用python3
#1.
建立一个S3桶 : es-bk
#2.
建立一个IAM Role : MyESRole
iam 角色信任关系(Trust relationships) Trusted entities 设定如下(需要先建立 ec2信任关系再改为es)
{
  "Version": "2012-10-17",
  "Statement": [
    {
      "Sid": "",
      "Effect": "Allow",
      "Principal": {
        "Service": "es.amazonaws.com"
      },
      "Action": "sts:AssumeRole"
    }
  ]
}
并给予下面权限(权限 permissions 下添加内联策略 inline policy)用于访问s3
{
  "Version": "2012-10-17",
  "Statement": [{
      "Action": [
        "s3:ListBucket"
      ],
      "Effect": "Allow",
      "Resource": [
        "arn:aws:s3:::es-bk"
      ]
    },
    {
      "Action": [
        "s3:GetObject",
        "s3:PutObject",
        "s3:DeleteObject"
      ],
      "Effect": "Allow",
      "Resource": [
        "arn:aws:s3:::es-bk/*"
      ]
    }
  ]
}
#3.
建立一个 IAM User : ESUser,并给予"iam:PassRole" 及 "es:ESHttpPut" 的权限
{
  "Version": "2012-10-17",
  "Statement": [
    {
      "Effect": "Allow",
      "Action": "iam:PassRole",
      "Resource": "arn:aws:iam::1234567890:role/MyESRole"
    },
    {
      "Effect": "Allow",
      "Action": "es:ESHttpPut",
      "Resource": "arn:aws:es:ap-southeast-1:1234567890:domain/dmses/*"
    }
  ]
}
#4.
在vpc 中的ec2 上写入 IAM User 的 access_id 和 access_key:
[ec2-user@ip-10-0-50-221 ~]$ mkdir ~/.aws
[ec2-user@ip-10-0-50-221 ~]$ vi ~/.aws/credentials
[default]
aws_access_key_id =
aws_secret_access_key =
注册备份仓库python 代码:
import boto3
import requests
from requests_aws4auth import AWS4Auth


host = '' # include https:// and trailing /    # es 终端url 结尾要加 /
region = '' # e.g. us-west-1
service = 'es'
credentials = boto3.Session().get_credentials()
awsauth = AWS4Auth(credentials.access_key, credentials.secret_key, region, service, session_token=credentials.token)

# Register repository

path = '_snapshot/my-snapshot-repo-name' # the Elasticsearch API endpoint
url = host + path

payload = {
  "type": "s3",
  "settings": {
    "bucket": "es-bk",
    "region": "us-west-1",
    "role_arn": "arn:aws:iam::1234567890:role/MyESRole"      # 上文角色arn
  }
}

headers = {"Content-Type": "application/json"}

r = requests.put(url, auth=awsauth, json=payload, headers=headers)

print(r.status_code)
print(r.text)
在同一个vpc中的ec2执行,会得到下列错误。
[ec2-user@ip-10-0-50-221 ~]$ python esbackup.py
403
{"error":{"root_cause":[{"type":"security_exception","reason":"no permissions for [cluster:admin/repository/put] and User [name=arn:aws:iam::1234567890:user/ESUser, roles=[], requestedTenant=null]"}],"type":"security_exception","reason":"no permissions for [cluster:admin/repository/put] and User [name=arn:aws:iam::1234567890:user/ESUser, roles=[], requestedTenant=null]"},"status":403}
#5.
重要的一步,折腾了好久(aws 的es 使用open distro 提供安全管理)
此错误的原因是因为 iam user和iam role没有map 到 manage_snapshots (或者直接给 all_access 权限)。需要从Kibana控制台进行设置。
截图:
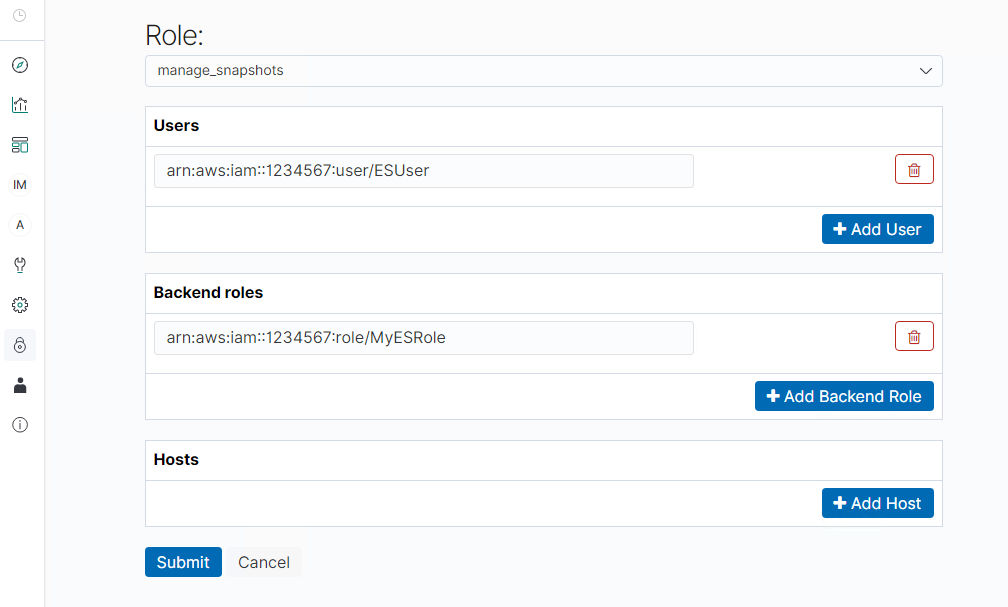
登陆Kibana控制台 -> security -> Role Mappings -> "+"
Role: manage_snapshots
Users: #3 中iam user的arn
Backend roles : #2 中iam role的arn
Hosts : *
#6
再次执行代码即可成功。
[ec2-user@ip-10-0-50-221 ~]$ python3 esbackup.py
200
{"acknowledged":true}
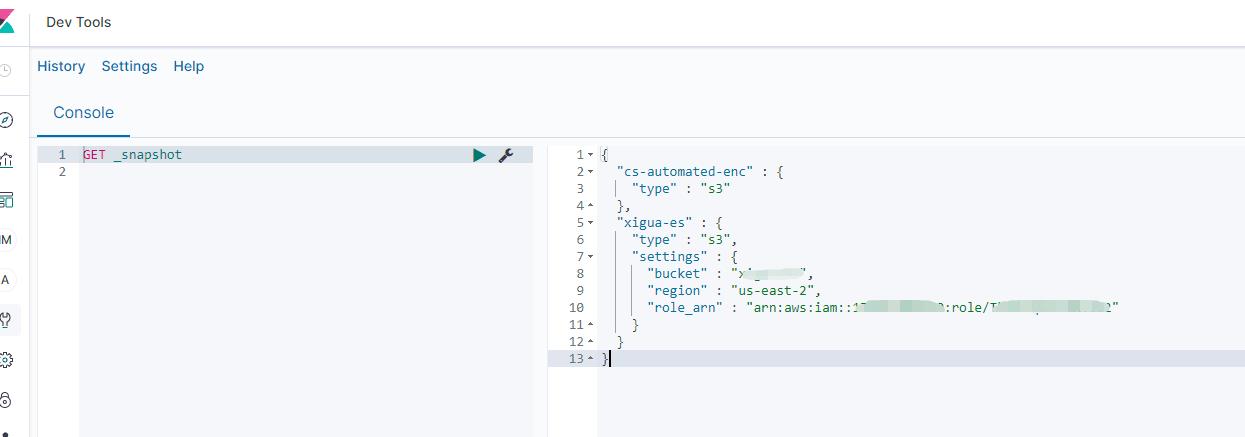
快照仓库注册完毕
kibana 内查看仓库:
#7.
拍摄快照python 代码:
import boto3
import requests
from requests_aws4auth import AWS4Auth

host = '' # include https:// and trailing /    # es 终端url 结尾要加 /
region = '' # e.g. us-west-1
service = 'es'
credentials = boto3.Session().get_credentials()
awsauth = AWS4Auth(credentials.access_key, credentials.secret_key, region, service, session_token=credentials.token)

# Take snapshot
path = '_snapshot/my-snapshot-repo/my-snapshot1'  # 上一步注册的仓库名和快照名
url = host + path
r = requests.put(url, auth=awsauth)
print(r.status_code)
print(r.text)
执行代码即开始拍摄快照。
[ec2-user@ip-10-0-50-221 ~]$ python3 takesnapshot.py
200
{"accepted":true}
kibana 内查看快照状态:

#8.
若无同vpc 内ec2 也可使用aws lambda 执行代码,操作要更麻烦一些,需要修改 lambda 角色权限,添加 requests requests_aws4auth 库的 .zip 档(本地打包)到函数的 layer(层)再执行。
需额外设置lambda 函数角色权限:
{
    "Version": "2012-10-17",
    "Statement": [
        {
            "Sid": "VisualEditor0",
            "Effect": "Allow",
            "Action": "es:*",
            "Resource": "*"
        }
    ]
}
{
    "Version": "2012-10-17",
    "Statement": [
        {
            "Effect": "Allow",
            "Action": "iam:PassRole",
            "Resource": "arn:aws:iam::1234567890:role/MyESRole"
        },
        {
            "Effect": "Allow",
            "Action": "es:ESHttpPut",
            "Resource": "arn:aws:es:ap-southeast-1:1234567890:domain/dmses/*"
        }
    ]
}
附 lambda python代码(运行时为 python3.6):
import boto3
from requests_aws4auth import AWS4Auth
import requests

host = ''  # include https:// and trailing /
region = ''  # e.g. us-west-1
service = 'es'
credentials = boto3.Session().get_credentials()
awsauth = AWS4Auth(credentials.access_key, credentials.secret_key, region, service, session_token=credentials.token)

# Register repository
path = '_snapshot/my-snapshot-repo'  # the Elasticsearch API endpoint
url = host + path


def lambda_handler(event, context):
    payload = {
        "type": "s3",
        "settings": {
            "bucket": "es-bk",
            # "endpoint": "s3.amazonaws.com", # for us-east-1
            "region": "",  # for all other regions
            "role_arn": "arn:aws:iam::1234567890:role/MyESRole"   # 有s3 访问权限的角色arn, 不是lambda 函数角色arn
        }
    }
    headers = {"Content-Type": "application/json"}
    r = requests.put(url, auth=awsauth, json=payload, headers=headers)
    print(r.status_code)
    print(r.text)

# Take snapshot     #  先执行上面注册仓库代码,再注释 payload = {  至此处,取消下方注释执行 拍摄快照代码。
    # path = '_snapshot/xigua-es/tk'
    # url = host + path
    # r = requests.put(url, auth=awsauth)
    # print(r.status_code)
    # print(r.text)
点击 部署 和 测试 按钮即可执行
#9.
参考链接:
使用 Amazon Elasticsearch Service 索引快照
在 Elastic Cloud 上从 AWS Elasticsearch 迁移到 Elasticsearch 服务
如何从AWS中的Elasticsearch索引平滑迁移至阿里云
Comments | 2 条评论
站点就很惊喜,2021快乐
@escher
新年好啊